Home Construction
August 12, 2017 18:05
Casings on the windows with their hands
Making house facade - an important step.Since ancient times, people tried to make a home unique face, covering the space near the doors and windows of intricate carvings.Our ancestors gave each made round sacred significance and hoped that these gold lace protect the home from penetrating the dark forces.Fashion antique leads to the fact that the ancient traditions were again in demand today.In this article, we will focus on how to trim on the windows made with their own hands.
Content
- project
- Sawing casings
- Grinding surface
- Priming and painting
- Assembly
- Installation
- Video manufacturing platbands at windows with their hands
project

Any business should begin with the project.First, paint the facade of the building, taking into account all the details in reality.Then it is necessary to make a drawing carved casings on the windows.You can also take advantage of the drawings and diagrams shown on the website.


Using visualization software, if any, can do 3D home design.It will show all of the complex, will assess how relevant your favorite wood trim on the windows.

When the project documentation is ready, prepare a set of tools that will be useful for the implementation of the forthcoming work.
- screwdrivers;
- drill down on a tree (12 mm);
- jigsaw, preferably with a smooth start-up, will be difficult to cut it out without complex elements;
- sander.
should take care of the material for future casings.Traditionally, it takes high-quality pine boards on which a minimum number of knots.If the knots are on the board surface, it is necessary to carry out cuts in such a way to avoid getting the place of a knot.
Sawing casings

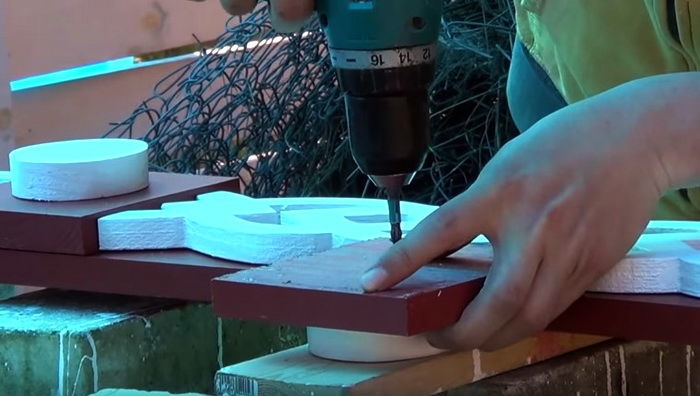
Production casings on the windows start with the cuts that have to do with the inside.First, holes are drilled along the contour of the figure, where it is supposed to do in the future openwork patterns.The video shows that when the drill should be held perpendicular to the surface of the board.


Next cut out using a jigsaw pattern itself.The work begins with the hole and perform cuts along the contour of the figure.


When the through patterns are ready, cut out the outer loop.

tool must be conducted from one end to the other, the direction does not matter.Pre nadpily made in the middle part.

The result is a finished part for window decoration.Next made a similar mirror image to use it on the opposite side.
Grinding surface

To give the wood an optimal appearance of the processing carried out by a grinder, emery wheel which must have grit 80. The result is a smooth surface ready for painting.
Priming and painting

Before painting works processed wood preservative that protects it from decay, from the bark beetles.This is to be applied to the entire surface, without missing even hard to reach places.Scrupulous work will allow Clypeus last for many years.

When the composition is applied, it is necessary to thoroughly dry the workpiece, and only then start painting details.The best option - a water-based paint intended for wood.Casings on the windows in a wooden house painted in one color, which is stated in the draft.For this project, we use the paint in two colors: white and cherry.


works are carried out with the help of 2 brushes: wide (50 mm) and narrow (20 mm).The first - for coloring the outer surface, the second - for internal.


It should be carefully paint over the details, leaving the uncoated sites.After drying the first layer, the second coated.

further be treated with lacquer blank.For this fit acrylic water-based lacquer.


One layer is enough.In compliance with the accuracy.Smudges can completely spoil the overall picture.To dry the product should under normal conditions - outdoors.
Assembly
assembly workpieces in a single composition better to on a horizontal surface.It is much more convenient than directly on the window.


Details are fixed to each otheraccording to the sketch via screws on the inside.Then, the front side will not be spoiled views fasteners.
Installation


Recent recommendations on how to make the trim on the windows associated with the installation features.To consolidate, located high above the ground on a window unit would require scaffolding.Mounting screws are.To set the volume elements better prigasit assistant.


If the work is done correctly, the result of the work will please more than one year.
Video manufacturing platbands at windows with their hands